
I had my first salt-rising bread from Rising Creek bakery in Mt. Morris, PA. I loved its different flavor and texture but knew it was complicated because of the finicky starter and long rising times, maybe even too complicated for this yeast bread baker. It wasn’t until I committed to teaching a West Virginia heritage foods class for WVU Extension that I felt it was time to tackle this traditional victual.
Starting with the Starter
The starter of any bread is usually the most difficult part, but this is especially true for salt-rising bread. The history of this bread is interesting, coming out of struggle and skill. Appalachian women in the mountains often had no access to store-bought yeast and were left to conduct informal kitchen chemistry to feed families. West Virginia homemakers found a combination of warm, fermented milk; corn meal; sometimes baking soda and sugar; would raise bread similar to yeast. The first known recipe for “Salt Risen Bread” comes from West(ern) Virginia in 1778.

Back in my kitchen, I felt like scientist with mason jar beakers. I tried four (4!) different starters so hopefully you won’t have the same fate. In my first starter I added cornmeal to milk that was too hot and ended with a jar of cornbread batter. The second looked better but still got too hot. The struggle of starters is keeping it warm to let it live but not too hot to kill it. Several recipes suggested keeping it in a crock pot but I found setting mine over a pilot light on my stove kept it perfect. For those without an old gas stove, I think a lightly warmed oven might be the best. My third starter started when I went back and added potatoes but I had already started my forth by then.
My fourth and successful starter was from My Recipes. This starter included baking soda and seemed to have the right amount of scalded milk, cornmeal, sugar, and salt. I combined and covered and let sit warm for two days.
Bam! the starter exploded overnight and I could see lots of activity. I added it to the second round proofing where you add flour, water, and wait some more (~4 hours).
Let’s Go Round Three
The third round of adding ingredients you can see the beginning of bread. You finally get to knead the dough (my favorite part!) and put into loaf pans. One more proofing (3 hours, no wonder this bread was made by people who were around the house all day) and then it was ready to pop in the oven. The actual baking part of this was easy and quick. It forms and nice natural crust without effort.
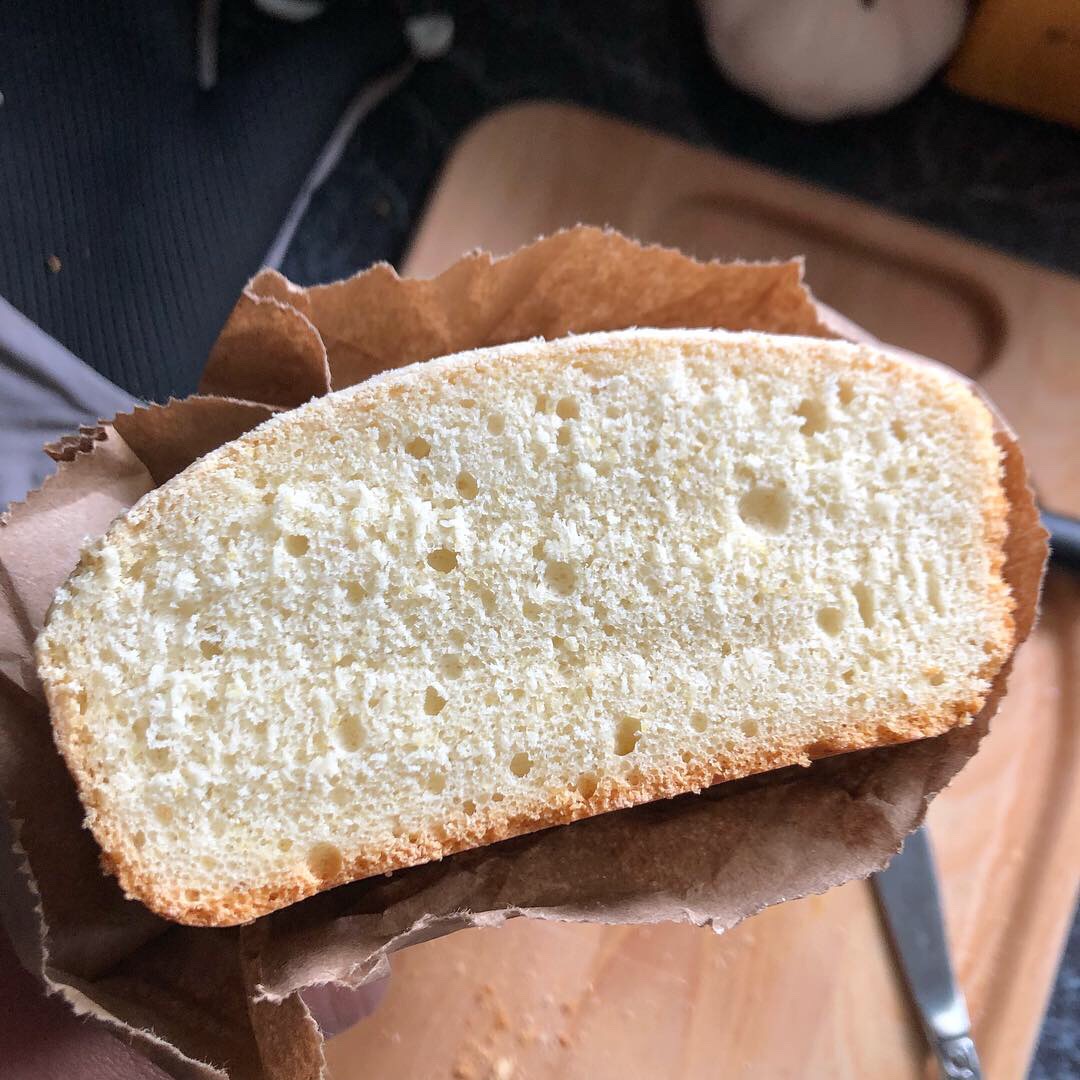
By the end I had three golden loaves ready for ramp butter and toasted cheese. Salt-rising bread has a much different smell (no yeast) and is a tighter texture. I love how different this bread smells. It also last longer than traditional bread (good for pioneers) — it can last a couple of weeks in the fridge so your effort won’t go to waste.
Once you make one batch, it seems a little less daunting and a little closer to Appalachian roots. Follow this recipe (or a family one) to make some lovely loaves of your own. The only change I made to the one found above is that I used butter as my shortening–some don’t call for any at all. It’s up to you kitchen chemist; happy baking!

Tips from the kitchen:
Plan out all the rising so you don’t end up baking bread at 1 am like me.
Try your own starters and warm places. No recipe suggested over pilot lights but it was a perfect temp for me.
Do what seems intuitive and expect some failure at first.
